Phoenix 3D Bullettime Light Painting Portrait
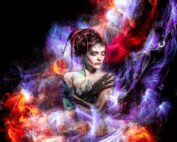
A colorful Lightpainting with a new technique and lightpainting tool. I get a bit more control over the brush strokes and i’m able to paint a bit like i would with real brush on paper.
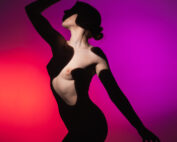
This was the final test with a real Model, Ira. She is a Makeup Artist – check out her Instagram profile for more of her work. The final images turned out much better than anticipated – and we only did 15 sequences.
Technical Information
I photographed each sequence using my multi-camera rig — 10 cameras in total for this shoot. All cameras were triggered simultaneously. Each shot took about 3 minutes to complete. The model was illuminated with a studio strobe to freeze her motion, while the rest of the scene was light-painted using a black fiber brush combined with colored gels.
The images are straight out of camera — no Photoshop or After Effects manipulation involved. Only basic adjustments for color and contrast were made in Lightroom.
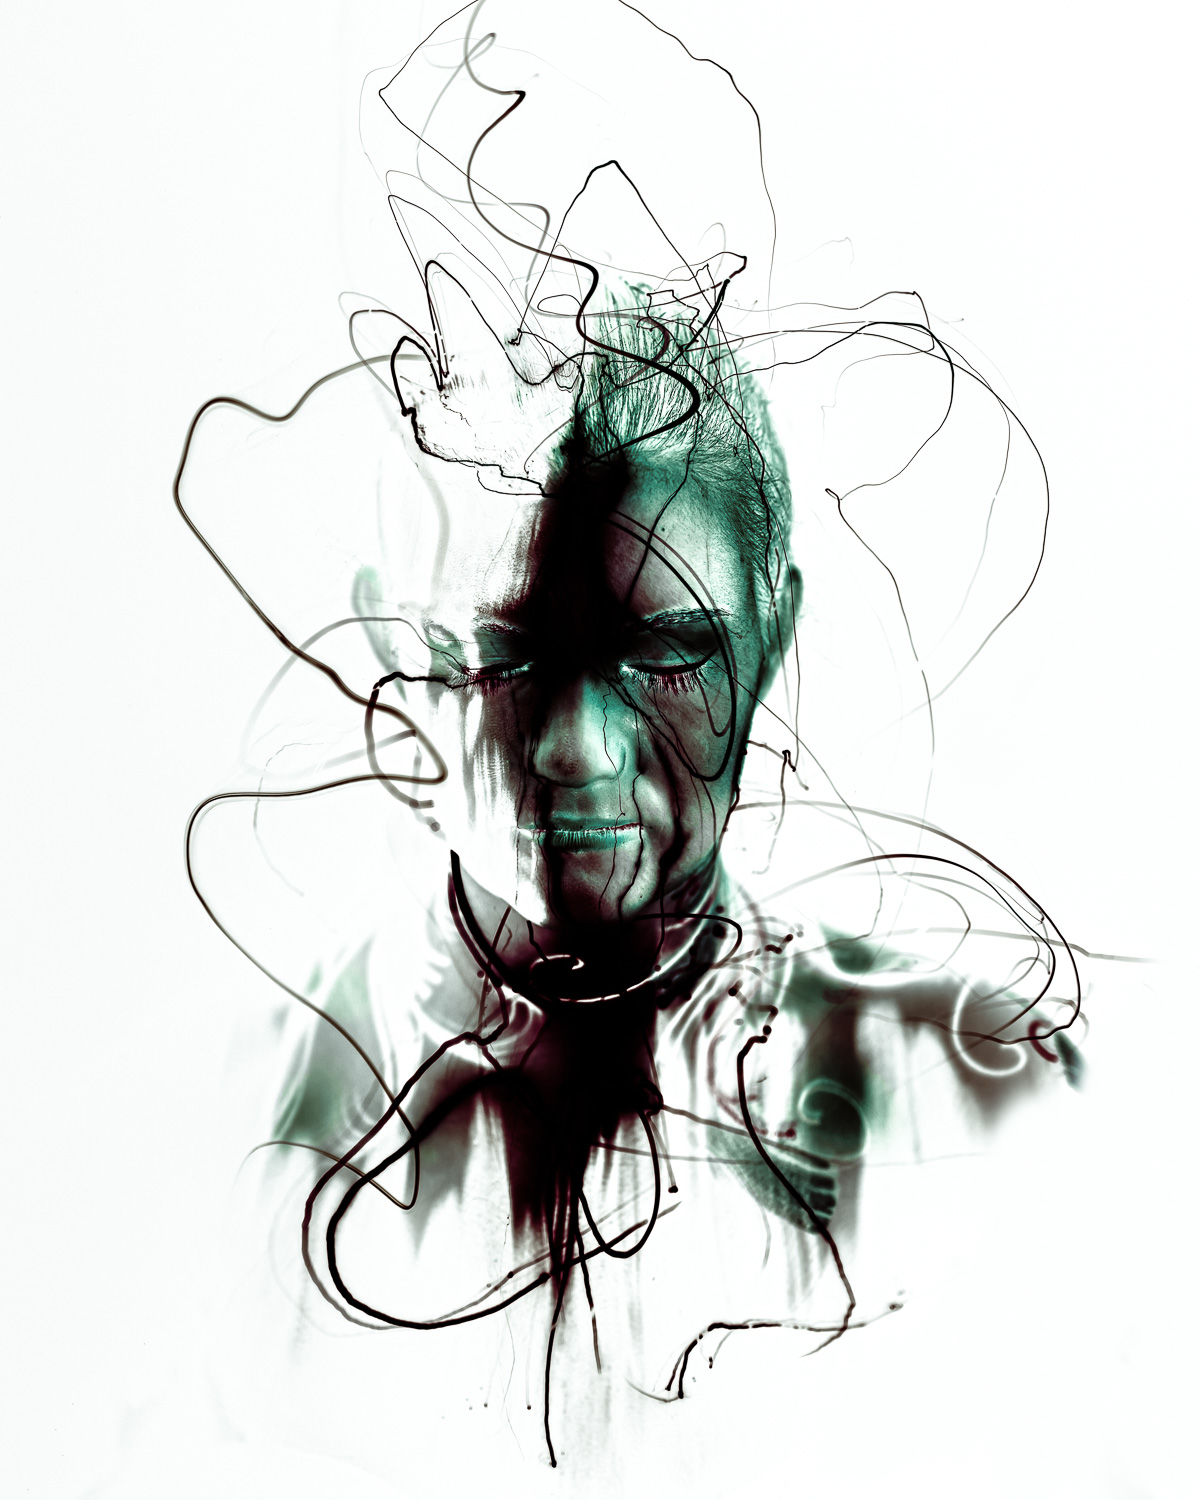
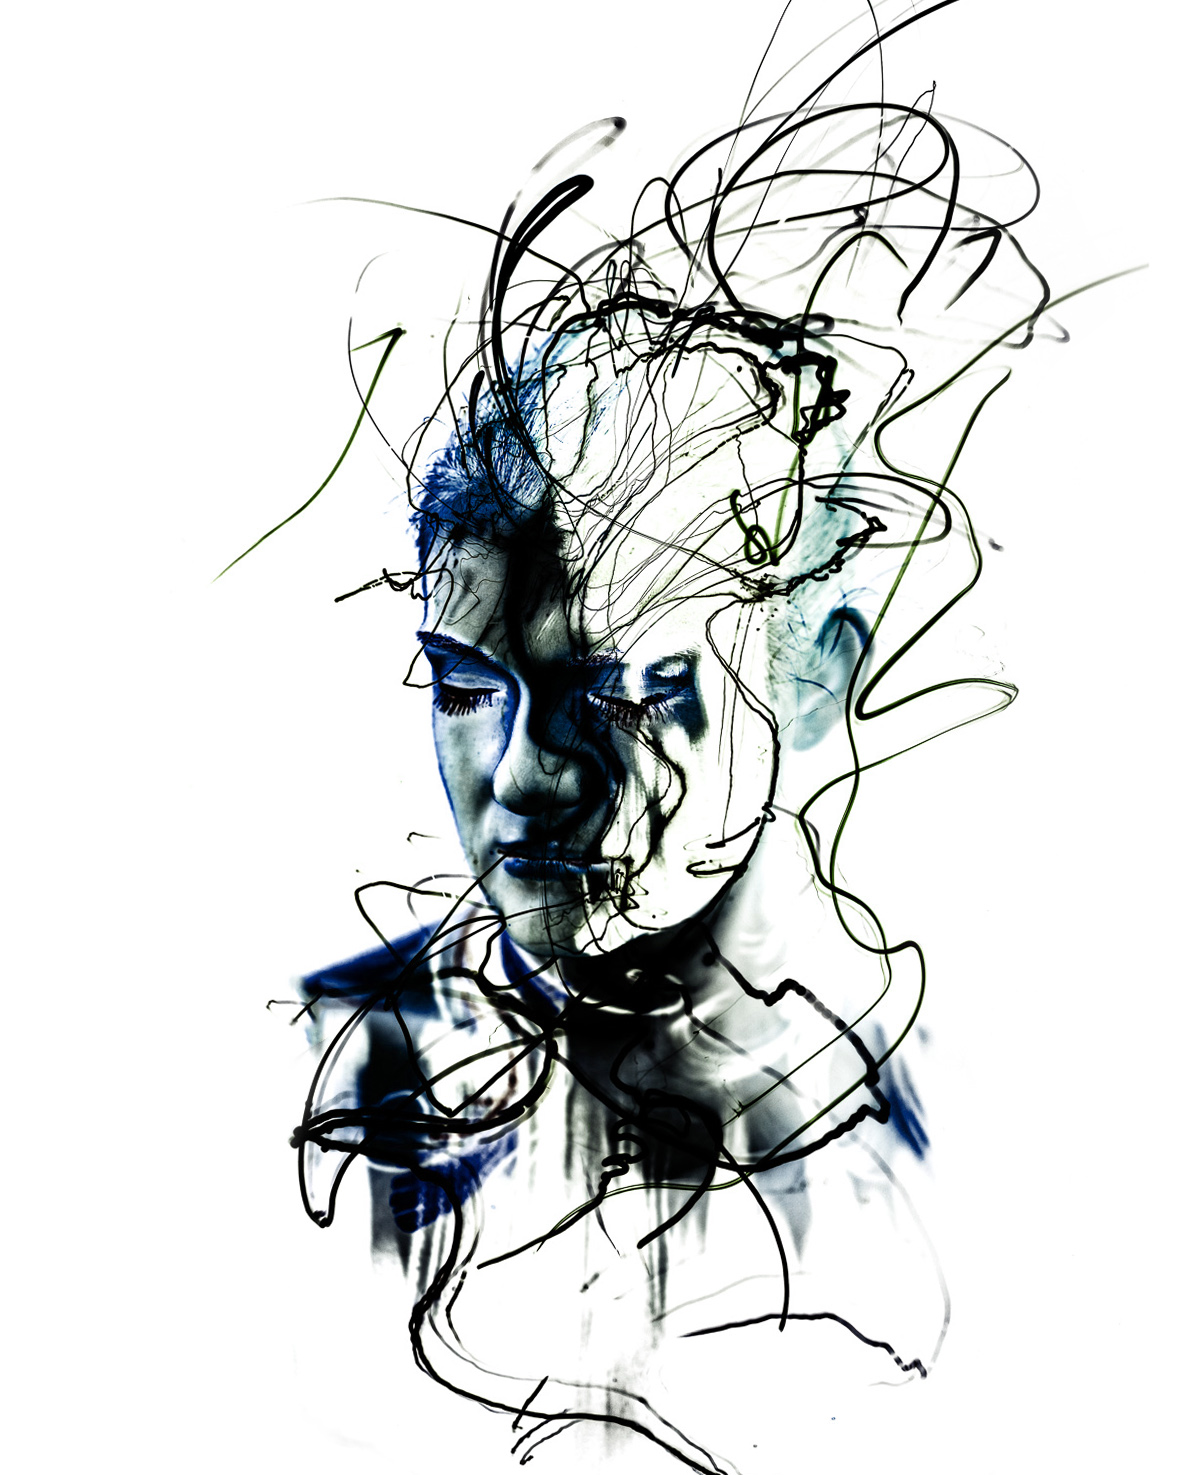
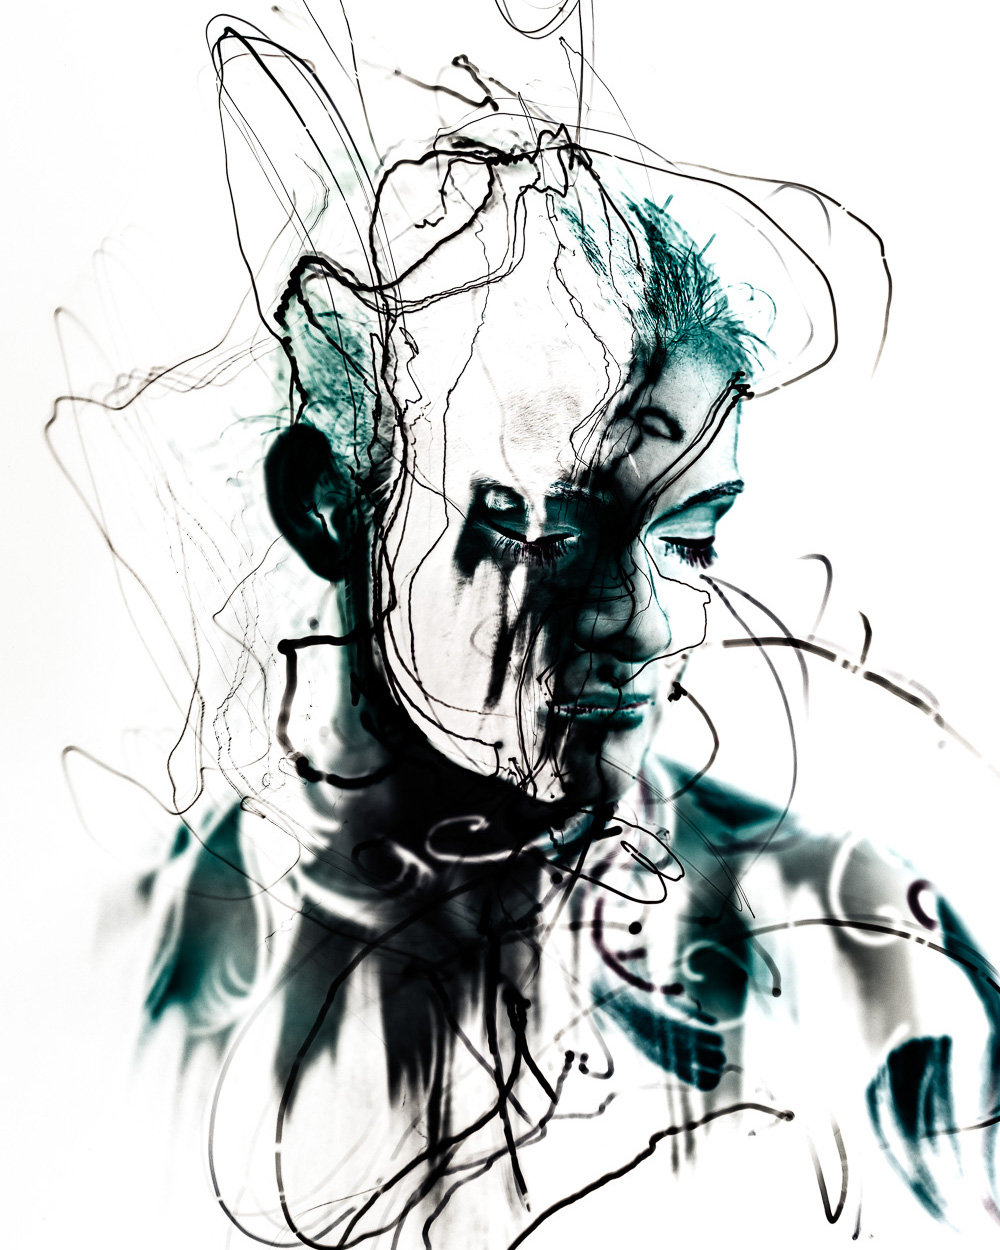
Below are some examples illustrating how the scene was lit. The test shots were taken early during the session to fine-tune the lighting setup.
-
On the left, you see the effect of the studio strobe. I used a small reflector with a grid to create a hard, focused light. This effect could also be achieved with a speedlight.
-
The short flash burst not only freezes motion but also creates a razor-sharp image due to the extremely short flash duration.
-
The center image shows the combination of light painting and strobe — very well balanced. The shadows on the model’s face are softened by the light painting brush.
-
On the right, only the flashlight (torch) was used for illumination. As you can see, without the strobe, the face remains too dark. While it’s possible to add more light to the face with the flashlight, the long exposure time (around 180 seconds) would result in a completely blurred face due to unavoidable motion.

3D Bullet-Time Information
In the sequence above, the images are only roughly aligned (I create additional in-between frames for smoother animations). As a final step, I plan to produce a glasses-free 3D print (autostereoscopic) using lenticular lens technology.


TAGS
FEATURED
Inverted Portrait - Photography with UV Bodypaint and Light Painting A Long Journey to a Technical Breakthrough This session represents the culmination of an idea that has been evolving for nearly [...]
LATEST


A Two-Part Photoshoot with Vanessa This session with Vanessa from Berlin was divided into two [...]

Phoenix 3D Bullettime Light Painting Portrait A colorful Lightpainting with a new technique and lightpainting [...]
Leave A Comment